Take Your Photography to the Next Level with RAW iPhone Photos
Learn how to shoot RAW iPhone photos for stunning and professional-looking images. Unlock the true potential of your iPhone camera.
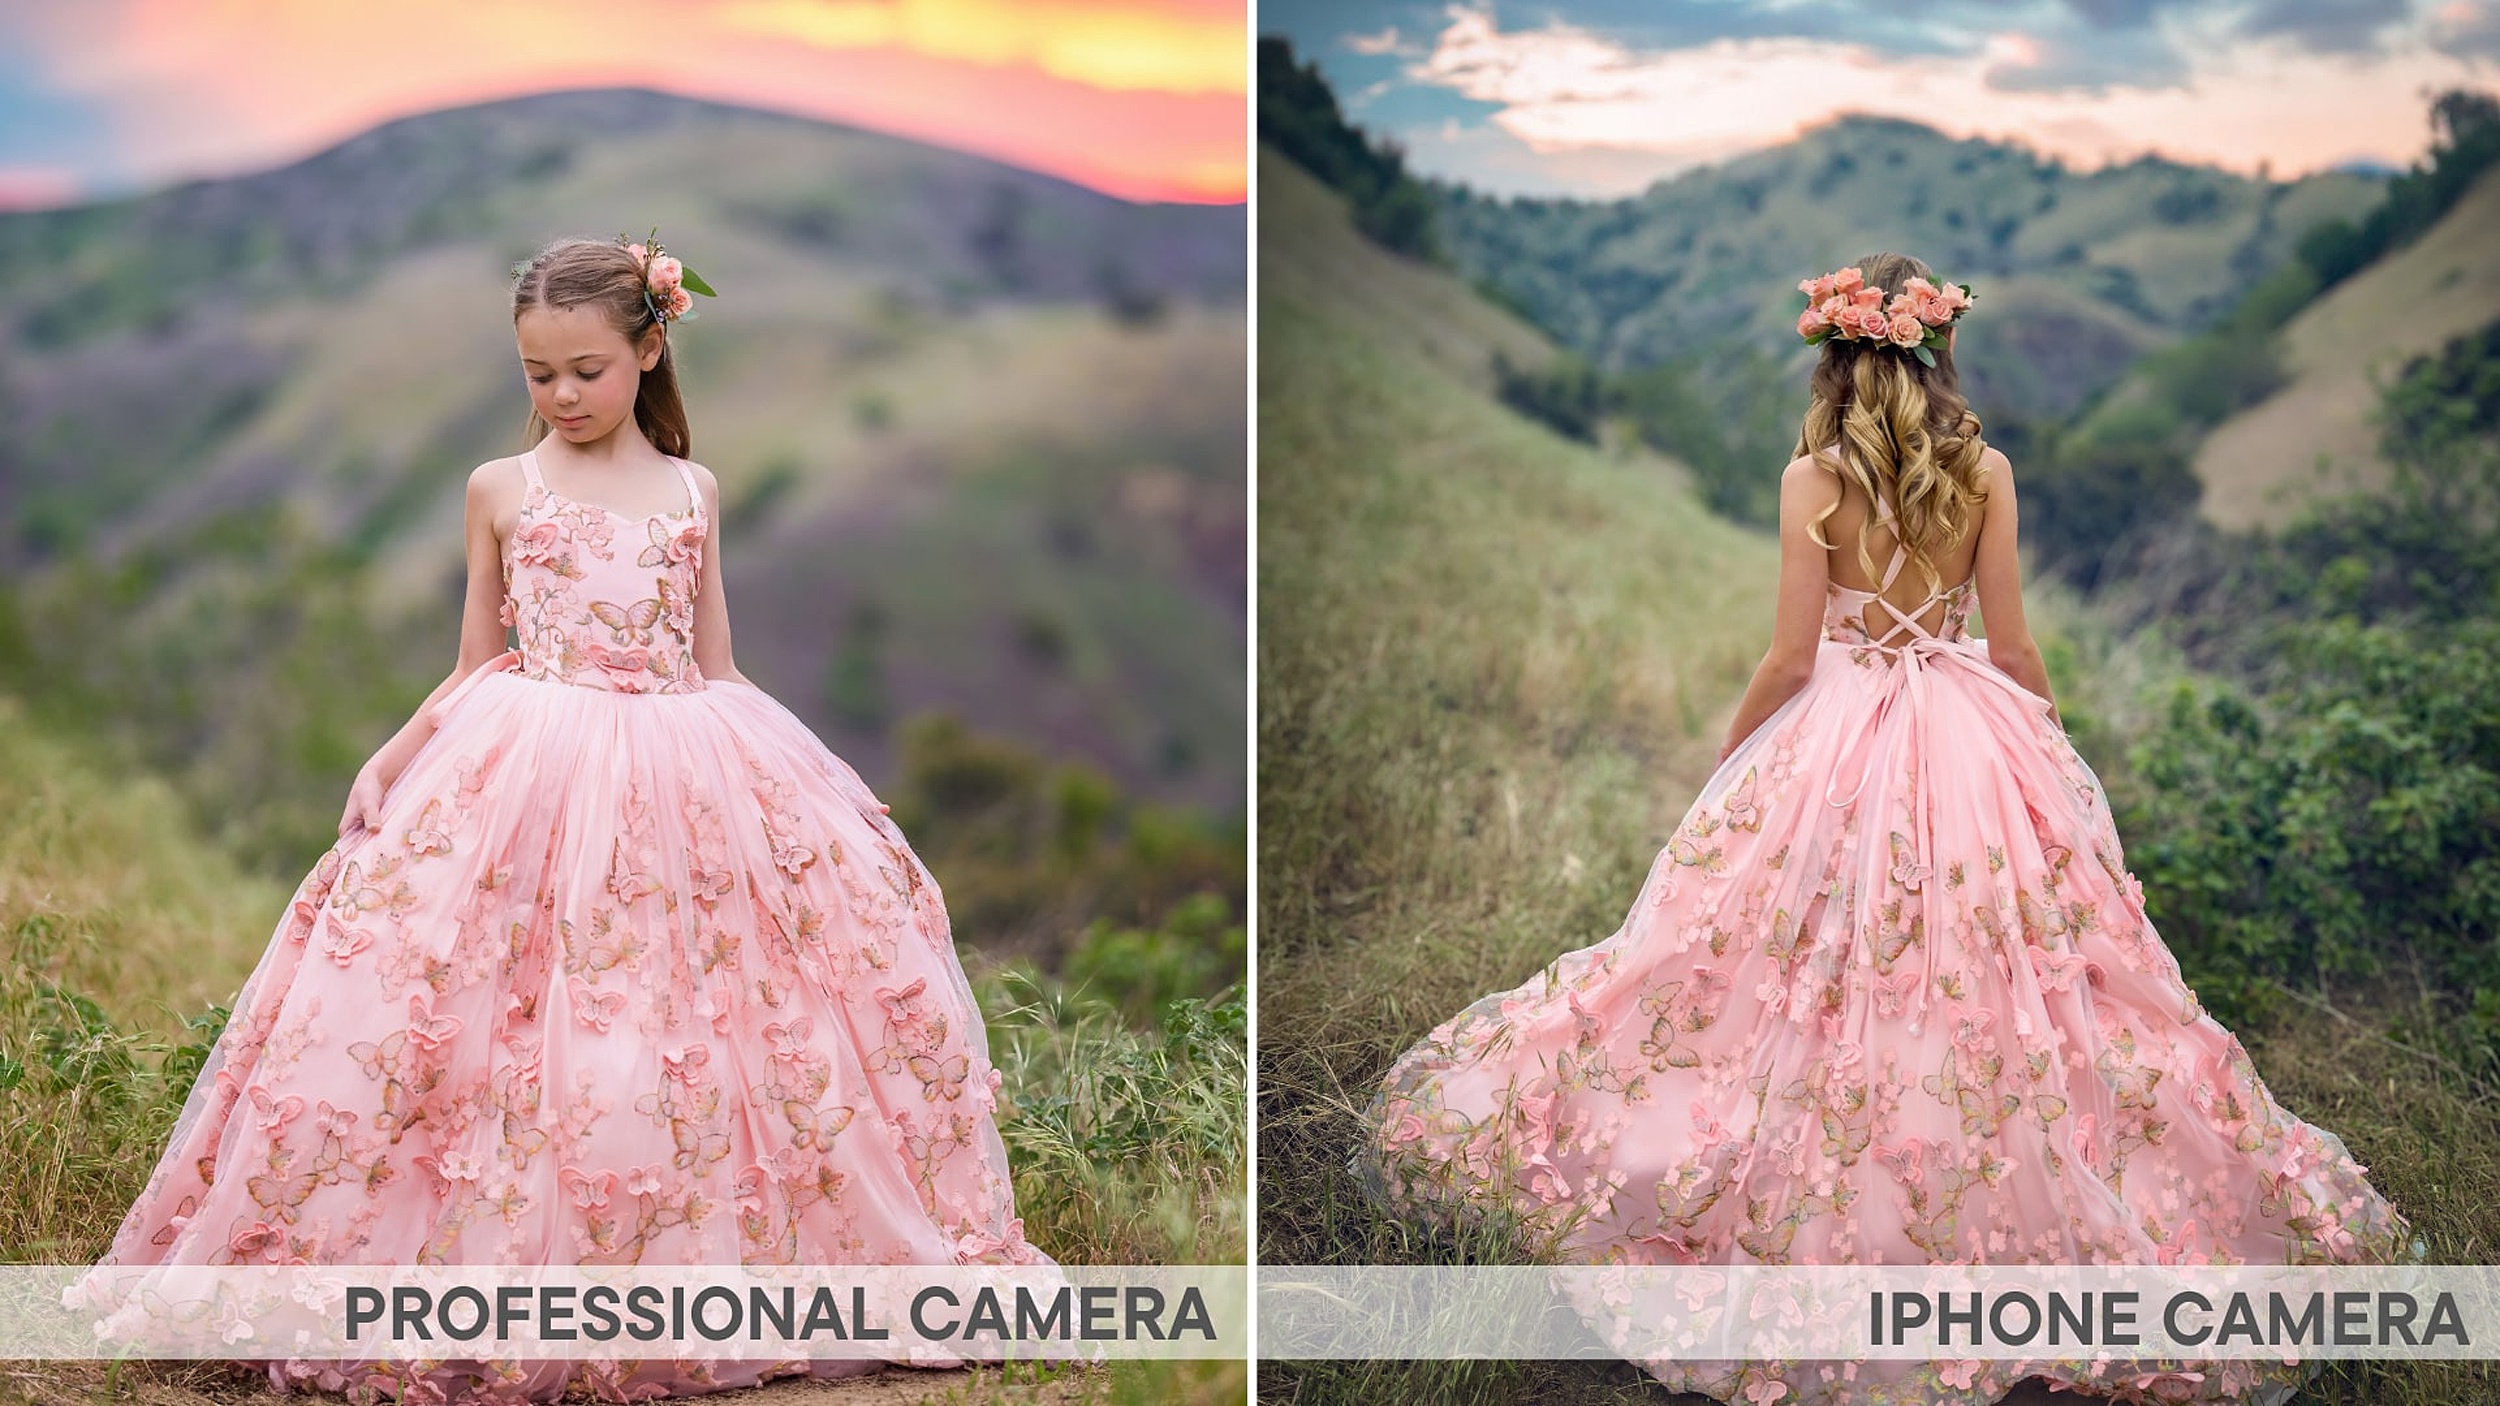
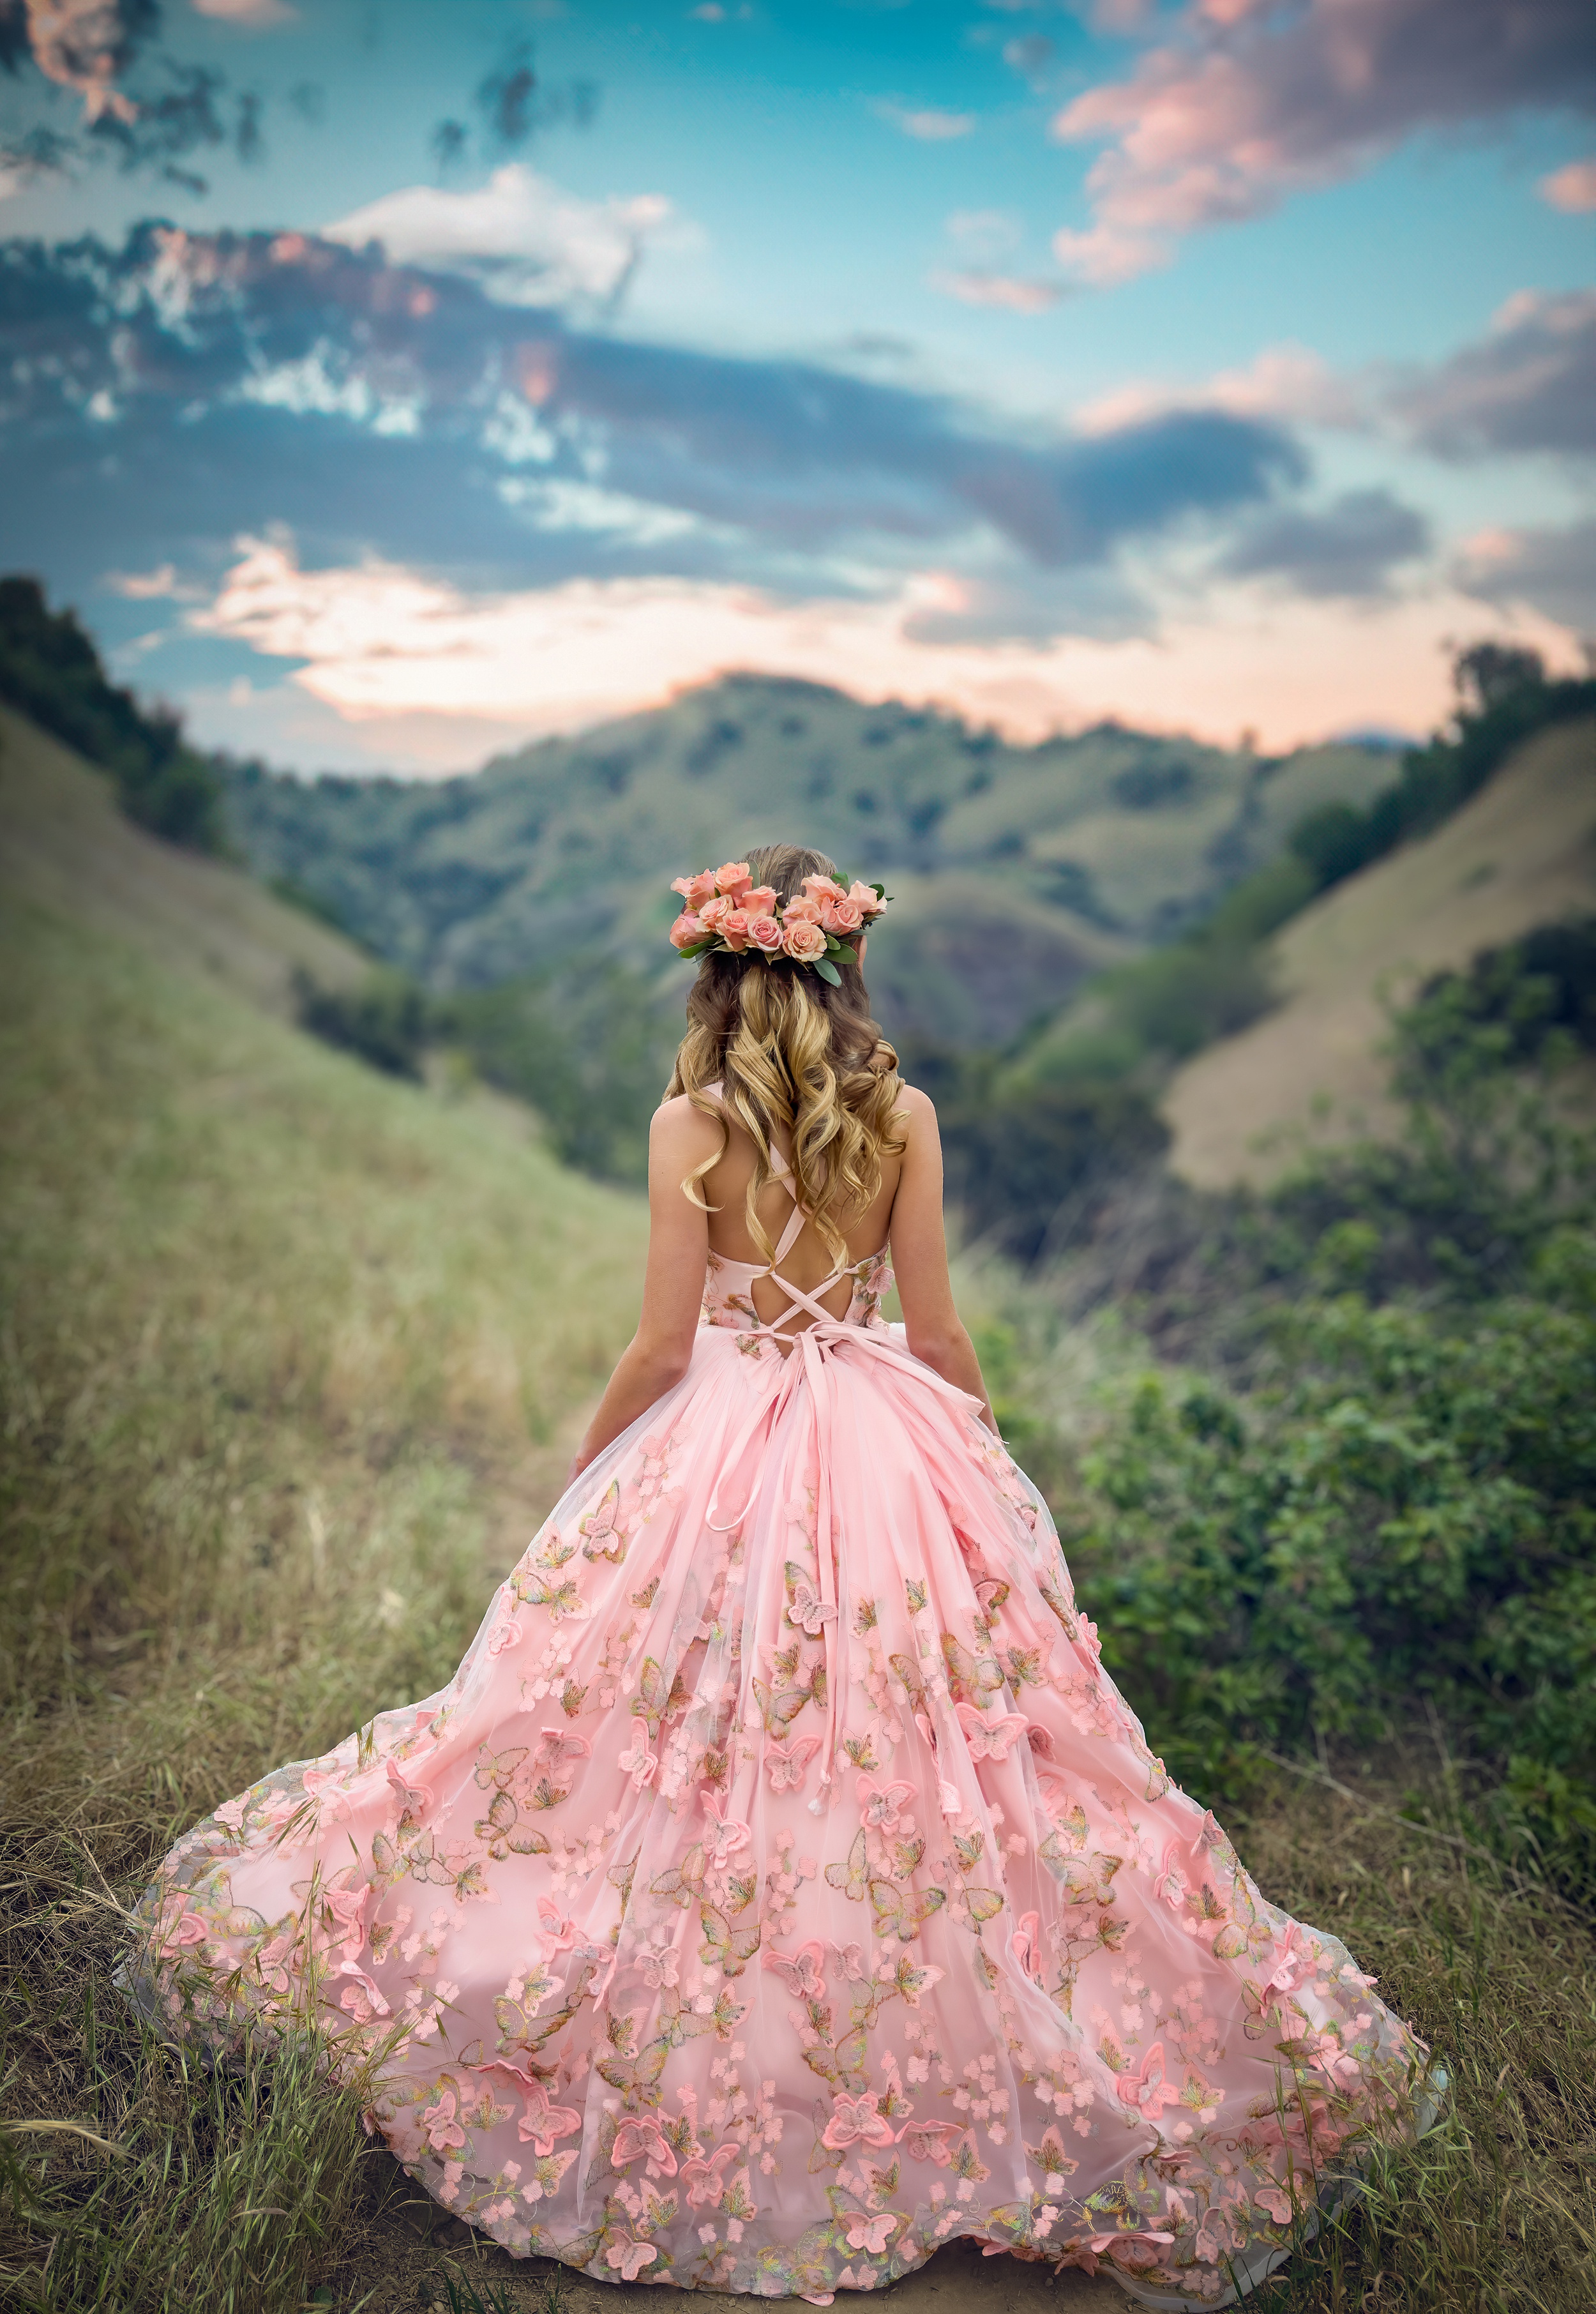
When you are on the go with your family, you probably don’t have a DSLR hanging around in your diaper bag. That doesn’t mean you don’t want high-quality portraits, so you can hang onto these moments forever! As professional photographers and moms, we know how important it is to document all those little moments so you can have memories of those seemingly simple days. That’s why we’re working to help you understand your iPhone camera’s capabilities so you can have stunning images that look professional. One of the best things to know when you’re figuring out how to unlock your phone’s true potential is how to shoot RAW iPhone photos. Here’s a quick rundown to get you started!
How RAW iPhone Photos Can Make A Difference In Your Photography
What Does Raw Mean In Photography?
Okay, so first off. What the heck do we mean when we say RAW iPhone photos? It’s pretty much exactly what it sounds like. It’s an untouched picture that neither you nor your phone has altered in any way. You see, your smartphone is always trying to anticipate how you see a moment. Each time you snap the shutter, it’s doing a lot of work adjusting the lighting, changing the colors, and then compressing the files so it’s not taking up too much storage space. This is great for someone who just wants a fast photo without having to do much work. The issue is that the quality isn’t going to be anywhere near as high as it could be.
By taking a RAW photo, you’re taking all the data that your camera sees and capturing it just the way it is. All the elements remain completely intact, so you’re getting the image exactly as your eyes see it. It’s not instantly compressing the image, giving you a higher quality image that will later give you far more control over the finished product. There’s a reason why it tends to be the favored style of many photographers! And if you need help remembering which of your pictures were taken in this format, Apple will then let you know by putting RAW in the upper left corner when you select the image.
Which iPhones Can Shoot RAW Photos?
Apple has its own ProRAW abilities that it enabled around 2020. The models capable of shooting in this mode include the following:
- iPhone 12 Pro
- iPhone 12 Max
- iPhone 13 Pro
- iPhone 13 Pro Max
- iPhone 14 Pro
- iPhone 14 Pro Max
- iPhone 15 Pro
- iPhone 15 Pro Max
(Forget which model your phone is? Just head to settings and click at the top where it has your name. By selecting this, you’ll be directed to your Apple ID, where it will show the model of your current phone)
If your phone came out before Apple released this technology, you may need to use a third-party app to shoot in “classic RAW.” This is also an option for phones after the model 12 that are not in the Pro series.
Why Should You Shoot RAW With iPhone?
There are a lot of advantages to shooting your iPhone photos in RAW. To begin with, you are going to have much more control if you intend to edit your images. As is, most smartphones capture images in a JPEG or HEIF format. Because of their compressed nature, it’s harder to control the individual elements. If you want to adjust the white balance, for example, there’s only so much you can do before your picture becomes a total mess.
With RAW, your picture will be in a Digital Negative. You are able to change elements individually. If there are parts of the image that could use a little more lighting, you can change that without over-exposing the entire picture. By doing this, you will let all the details shine through. Plus, you don’t have to worry about the added graininess that can come from adjusting the elements in the full picture. This gives you a much more forgiving style that you can still change as needed.
If you’re trying to decide when to shoot in RAW, here are a few scenarios where it’s especially helpful.
- Moments with low-lighting
- Pictures where you plan on doing a lot of post-production touch-ups.
- Times when you want the highest quality possible.
How To Enable RAW
So, now that you have a better idea of what RAW iPhone photos are, it’s time to turn it on. The first thing you need to know is that Apple has two different forms of RAW.
- There is the RAW format as described earlier. This is the classic definition that captures images exactly how you see them. This is available through third-party apps.
- Then, there’s the Apple ProRAW. Again, this was a feature that was introduced in 2020. This is still going to have some of the smart features enabled, but you’re still going to have the benefits of the original RAW format.
To set this up, you can go to your Settings file, go to Camera, and then to Formats. From there, you should be able to turn on Apple ProRAW (it might say ProWAR & Resolution Controls on some models). Once you have it all set up, you should be able to easily toggle between having RAW on or off. You can then open up your camera and tap on the RAW icon to turn it on or off.
If you want to preserve your RAW settings, you can head back on over to Settings, go to Camera, and then hit Preserve Settings before turning on Apple ProRaw.
If you want to get the most out of Apple ProRaw on models starting with iPhone 14 Pro,, you will likely want to go to Settings then Camera then Formats before turning on ProRaw and Resolution Control. You can go to Pro Default and choose the format. Otherwise, it will use JPEG Max instead of HEIF Max.
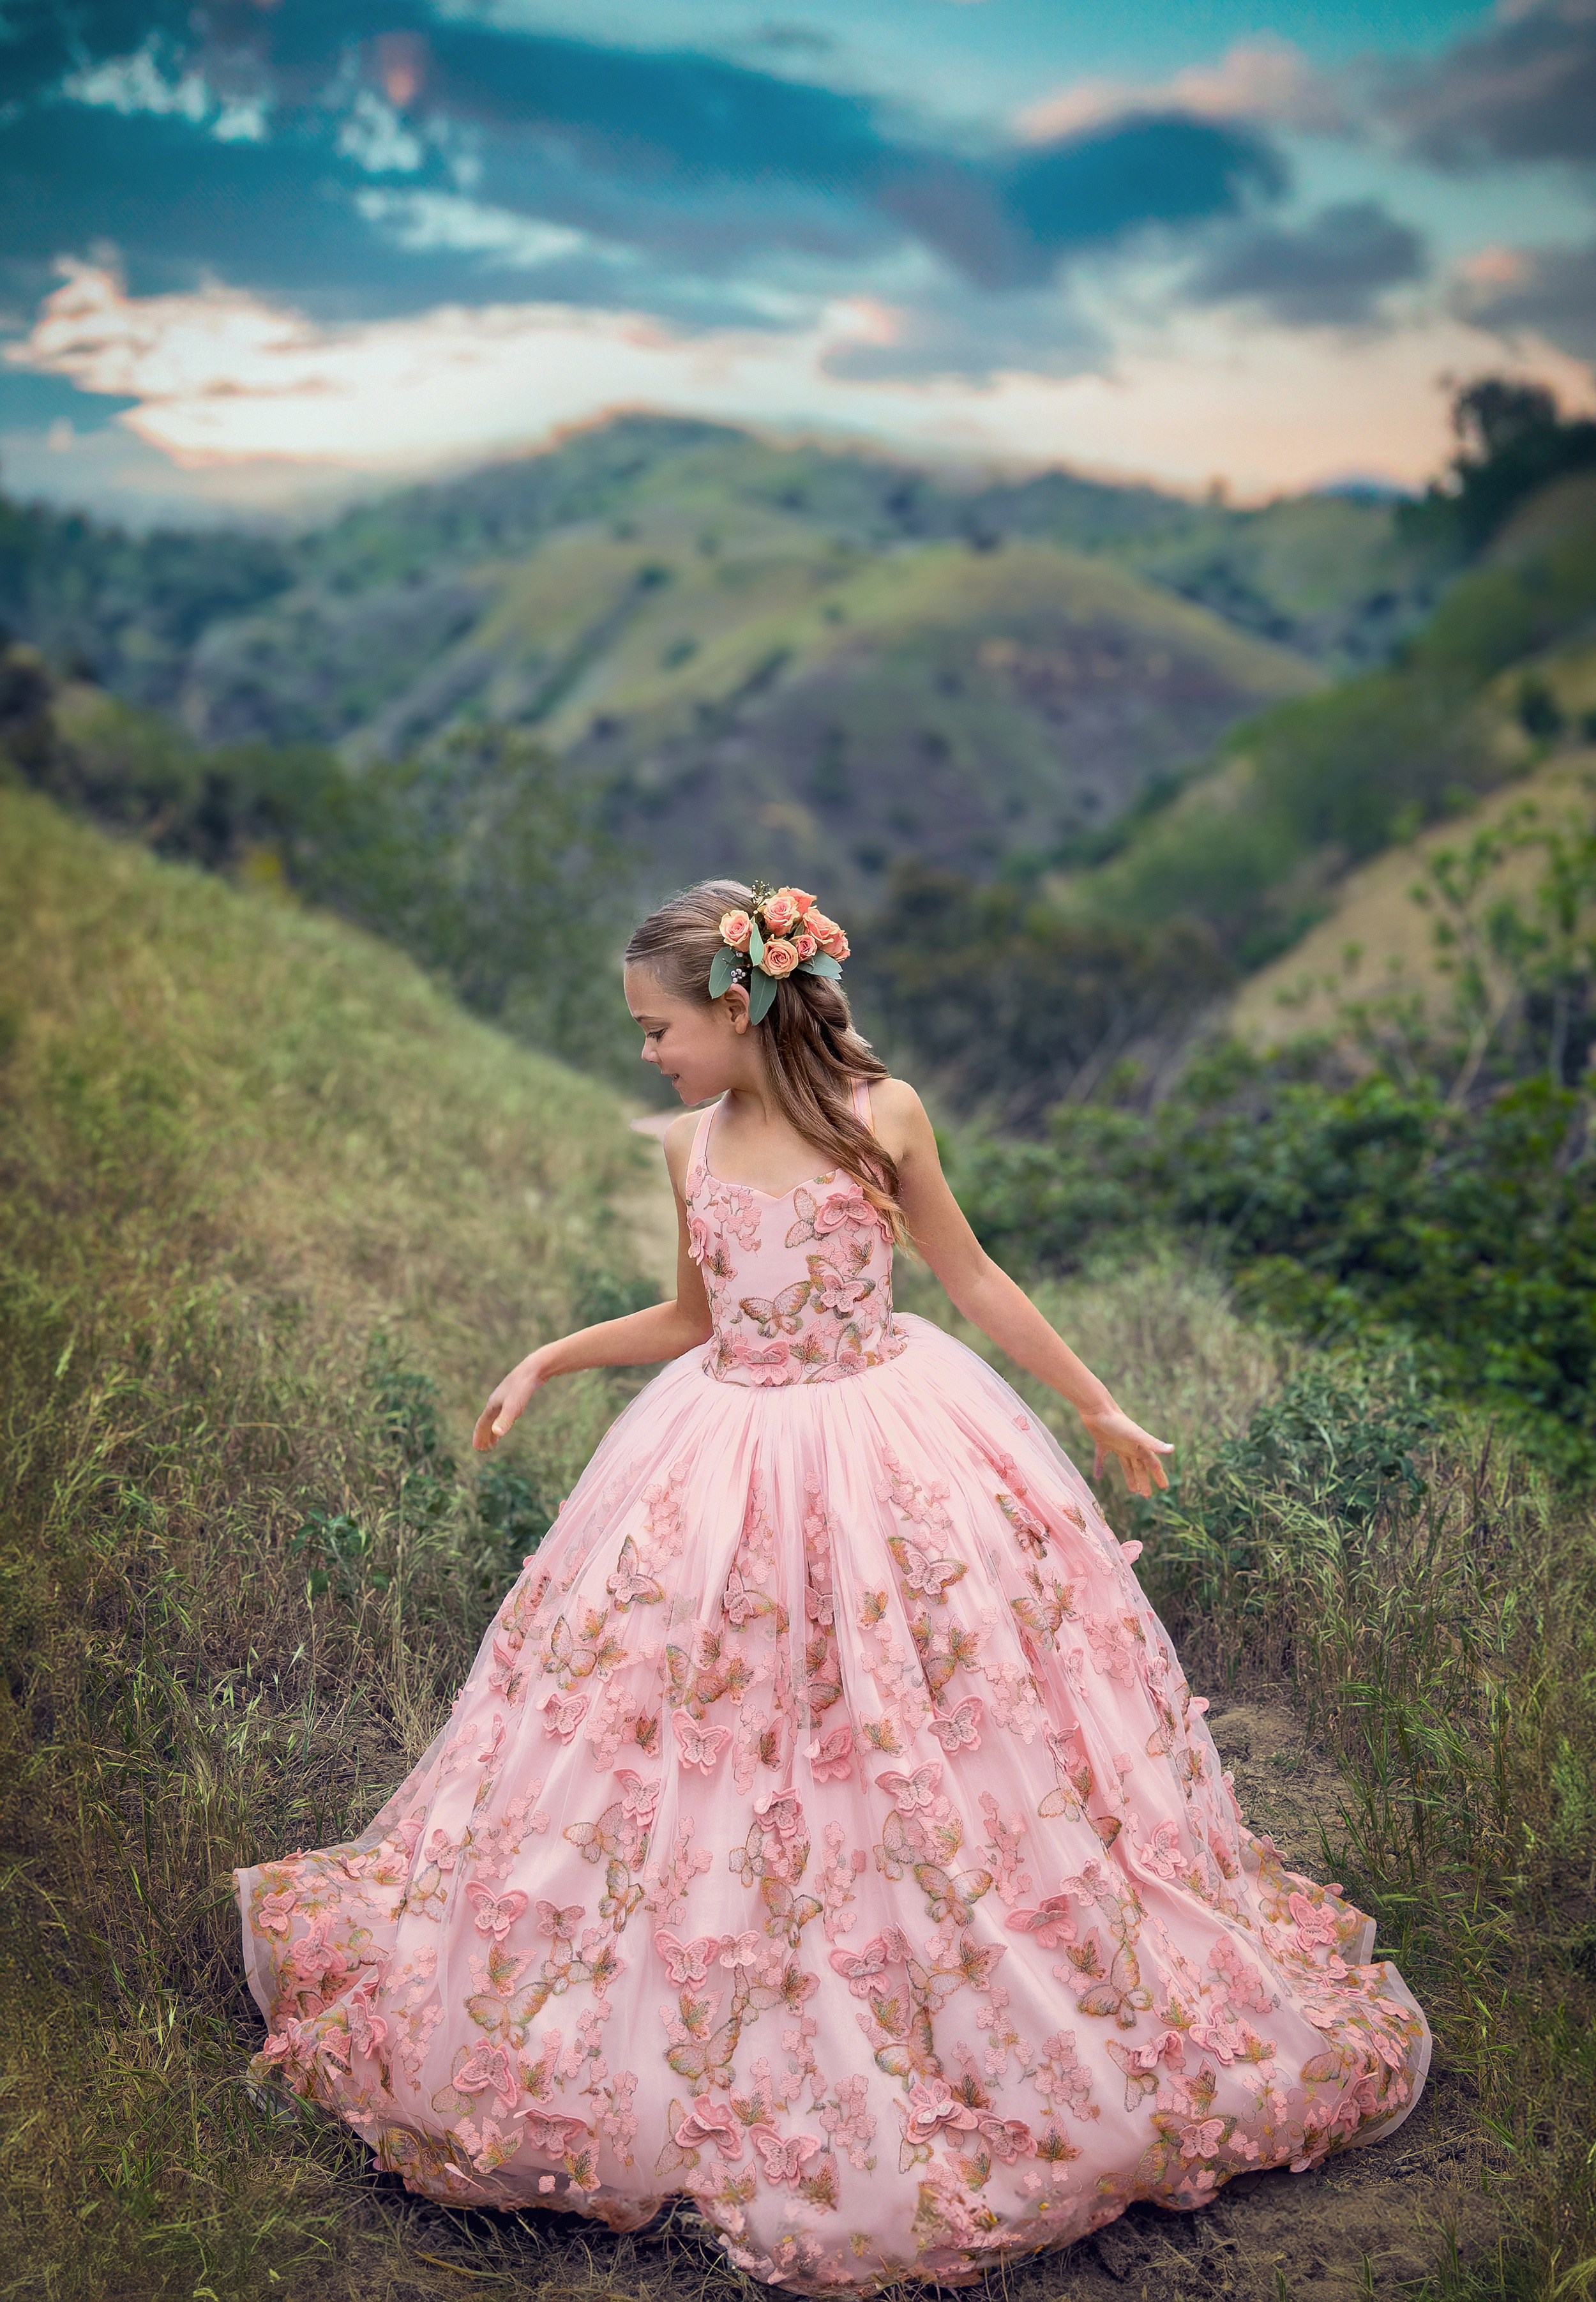
You Will Love The Difference When You Switch To RAW iPhone Photos
By shooting RAW iPhone photos, you will have positively stunning pictures that you can adjust however you’d like. And if you need more help capturing your family’s memories, be sure to join the Momographers program!
While you're here, don't forget to join our moms group for even more tips and tricks! Also, be sure to check out more blog posts below!
